How to Enable Telnet on Windows 10 and 11: Step-by-Step Guide
- Joshua Lawrence
- Apr 14, 2025
- 3 min read
Telnet is a powerful command-line tool that allows users to establish remote network connections with other computers and devices. While it’s an older protocol, Telnet remains a valuable utility for IT professionals and network enthusiasts, particularly for tasks such as network diagnostics, troubleshooting, and accessing systems that do not require encrypted connections.
By default, Telnet is disabled on Windows 10 and Windows 11, but don’t worry — enabling it is quick and straightforward. Whether you’re using it for a specific project or need it for troubleshooting, this guide will show you exactly how to enable Telnet on your Windows device.
We’ll cover multiple methods, including using the Control Panel, Command Prompt, and PowerShell, so you can choose the approach that works best for you.
Ways to Enable Tenet on Windows 10 and 11
You can enable Telnet on Windows 10 and 11 via Control Panel, Command Prompt, and Windows PowerShell.
How to Enable Telnet on Windows 10/11 Using the Control Panel
Follow these steps to install Telnet through the Control Panel:
To access Run, press “Win + R.”
To open the Control Panel, type control and click “OK.”

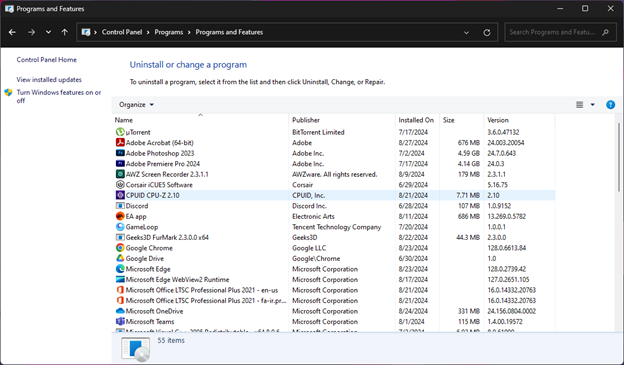
Select “Uninstall a Program” from the Programs and Features section of the Control Panel.

Click the “Turn Windows features on or off” button on the left side.

Navigate to the bottom of the Windows Features dialogue box and choose “Telnet Client.”

As you wait for the feature to install, click “OK.” To activate the function and implement the modifications, restart your computer after the installation.
Enable Telnet on Windows 10/11 via Command Prompt (CMD)
To set up Telnet using Command Prompt, perform these steps:
After pressing the Win key, type “cmd.”

Use the Command Prompt by right-clicking and choosing “Run as administrator.”

Enter the following command in the Command Prompt window and hit Enter:
dism /online /Enable-Feature /FeatureName:TelnetClient
The feature will be enabled by Command Prompt, which will also show the message “operation completed successfully.”
Enable Telnet on Windows 10/11 with PowerShell Commands
To activate the Telnet Client with Windows PowerShell, use the activate-WindowsOptionalFeature cmdlet. It is quicker than the GUI method and useful if you cannot activate the feature using the Windows Features dialogue.
Follow these instructions to enable Telnet:
1. To access the WinX menu, press “Win + X.”
2. To launch the terminal application as administrator, click “Windows Terminal(Admin)” and select Yes.

3. To enable Telnet, put a specific command into the PowerShell window and hit Enter:
Enable-WindowsOptionalFeature -Online -FeatureName TelnetClient

4. This process can take a few minutes to finish, so wait for a progress update. If it works, the outcome will appear as “Online:True.”
How to Verify the Installation of Telnet
Once you have enabled Telnet on your Windows 11 device, you can ensure the installation is correct. Follow these steps:
Click the Start menu, press the Windows key, and then type “Command Prompt” or “cmd.” Click the Command Prompt icon with a right-click, then choose “Run as administrator.”
Type Telnet into the Command Prompt window and hit Enter.
You will know Telnet is operational when “Microsoft Telnet” appears on the screen, indicating a successful installation.
If you follow these steps correctly, you can install Telnet on your Windows machine using any of the methods above. We hope this guide answered any questions you had about the topic as well!


Comments